Display dynamic content across different pages on Shopify
Learn how to use Sections Everywhere to display dynamic content across Shopify products, collections, blogs, articles, and pages.

With the release of Online Store 2.0 in Shopify, merchants can now use sections everywhere to display dynamic content on different pages. Kind of.
Sections Everywhere allows you to create a unique template that will have dynamic sections available on each of those templates. It’s a great new feature, however, more than a few merchants I’ve talked to have noticed that it is not always easy to have dynamic content across your theme since sections are based on the template you are using.
Most resources (products, collections, blog posts, and pages) in Shopify use a template. These templates are used to output content from Shopify’s content management system into the theme that is used. Themes have always been able to utilize multiple templates per resource - and merchants can select these templates in Shopify when setting up your resource (if it exists in the published theme).
How was this done prior to Online Store 2.0?
Previously, in order to have dynamic content on different pages, merchants (or developers) would have needed to edit their theme code to duplicate templates to have dynamic section content (imagine a landing page with a slideshow, video, and lots of image blocks with text) and then connect it to the live theme to select it in the resource template dropdown.
With the rollout of OS 2.0, you can now manage duplicating templates directly in the Shopify theme editor. Shopify recently updated this to not only work for pages but also for collections, products, blogs, and blog posts.
How to duplicate a template in Shopify (with no code)
For our use-case, we’re going to focus on duplicating a page template to add a wholesale registration form on a separate page to capture wholesale customers.
Let’s jump in.
- Login to your Shopify store.
- Navigate to Online Store (your theme library will load automatically)
- Click the Customize button (if your store is live, we recommend following these steps in a duplicate, unpublished theme).
While in the theme editor, click on the dropdown menu in the top center of the editor.

Navigate to Pages, at the bottom you will see in blue text “+ Create Template”.
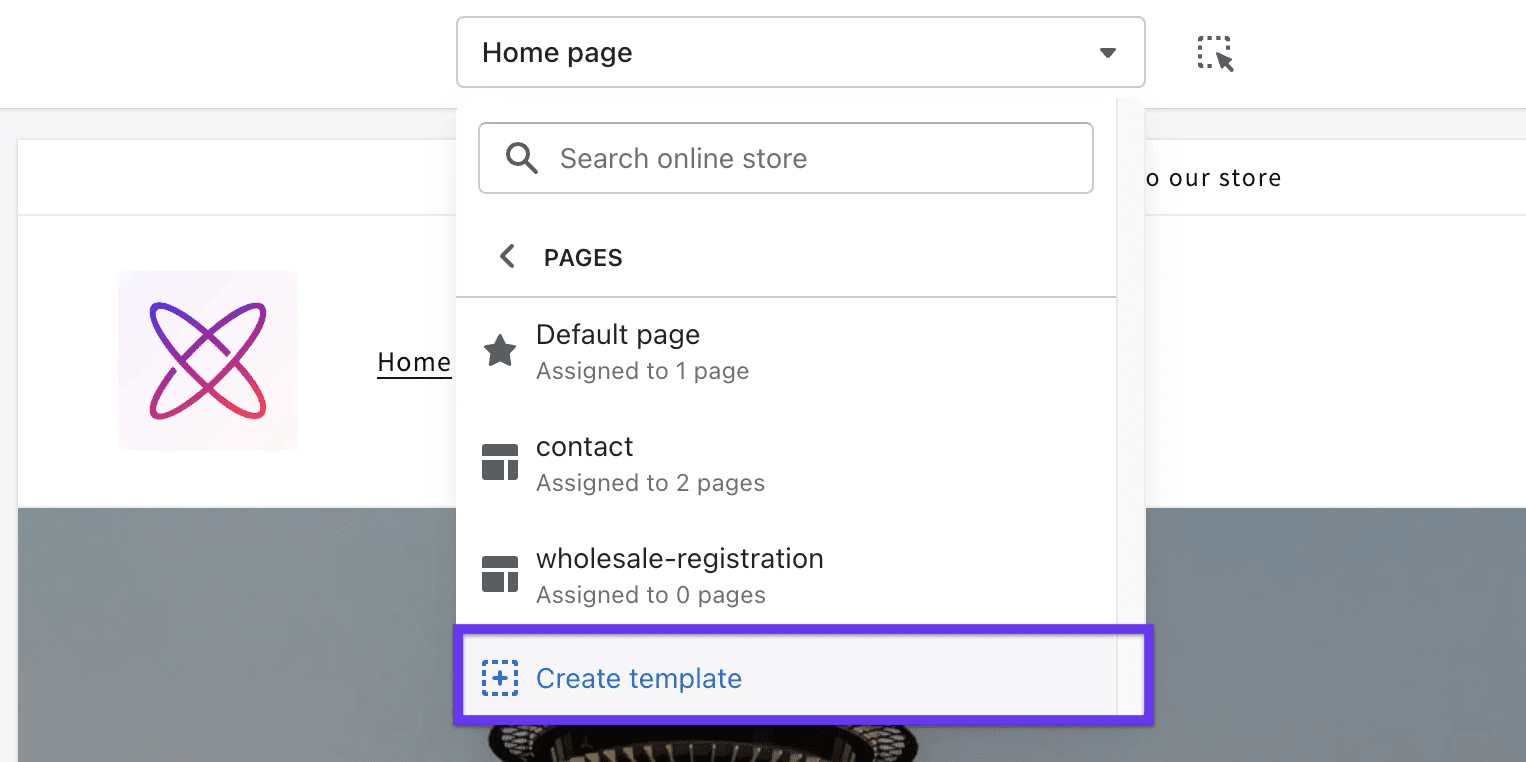
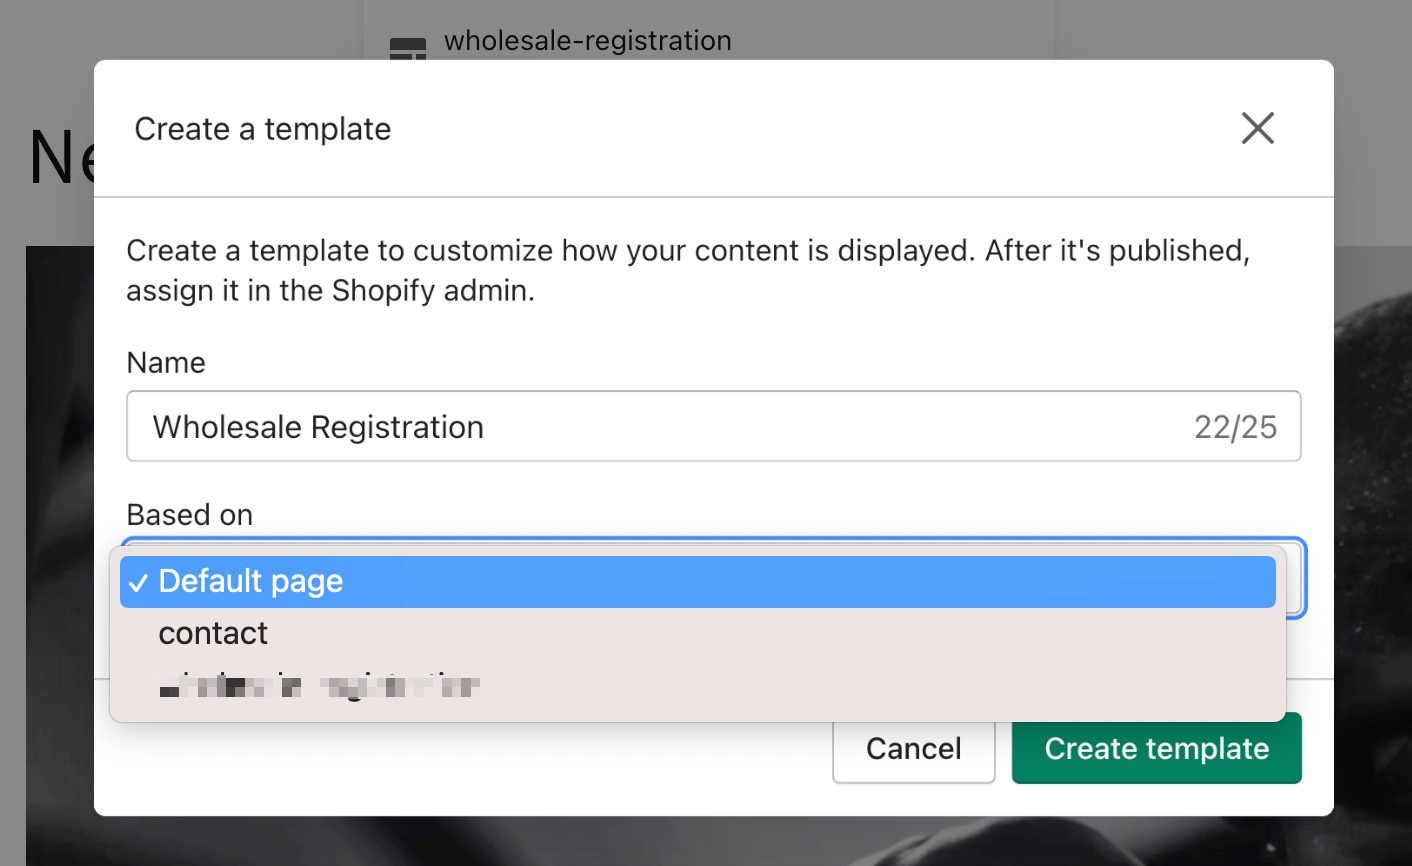
Once you click on “+ Create Template” a modal will show where you can name your new template and choose the template it should be based on. Keep in mind that it will duplicate any section data that is present in the template you choose (this can easily be cleaned up by removing any sections you do not want in your new template after it is created). For our example, we’re duplicating from “Default page”, which is the default page template in any Shopify theme.
Next, we need to add our template to a page resource in Shopify. To do this, select the page you want this template assigned to, or create a new page. Once in the page editor, look for the Online Store card on the right hand side of the page. Click on the “Theme template” dropdown and select the template we just created.
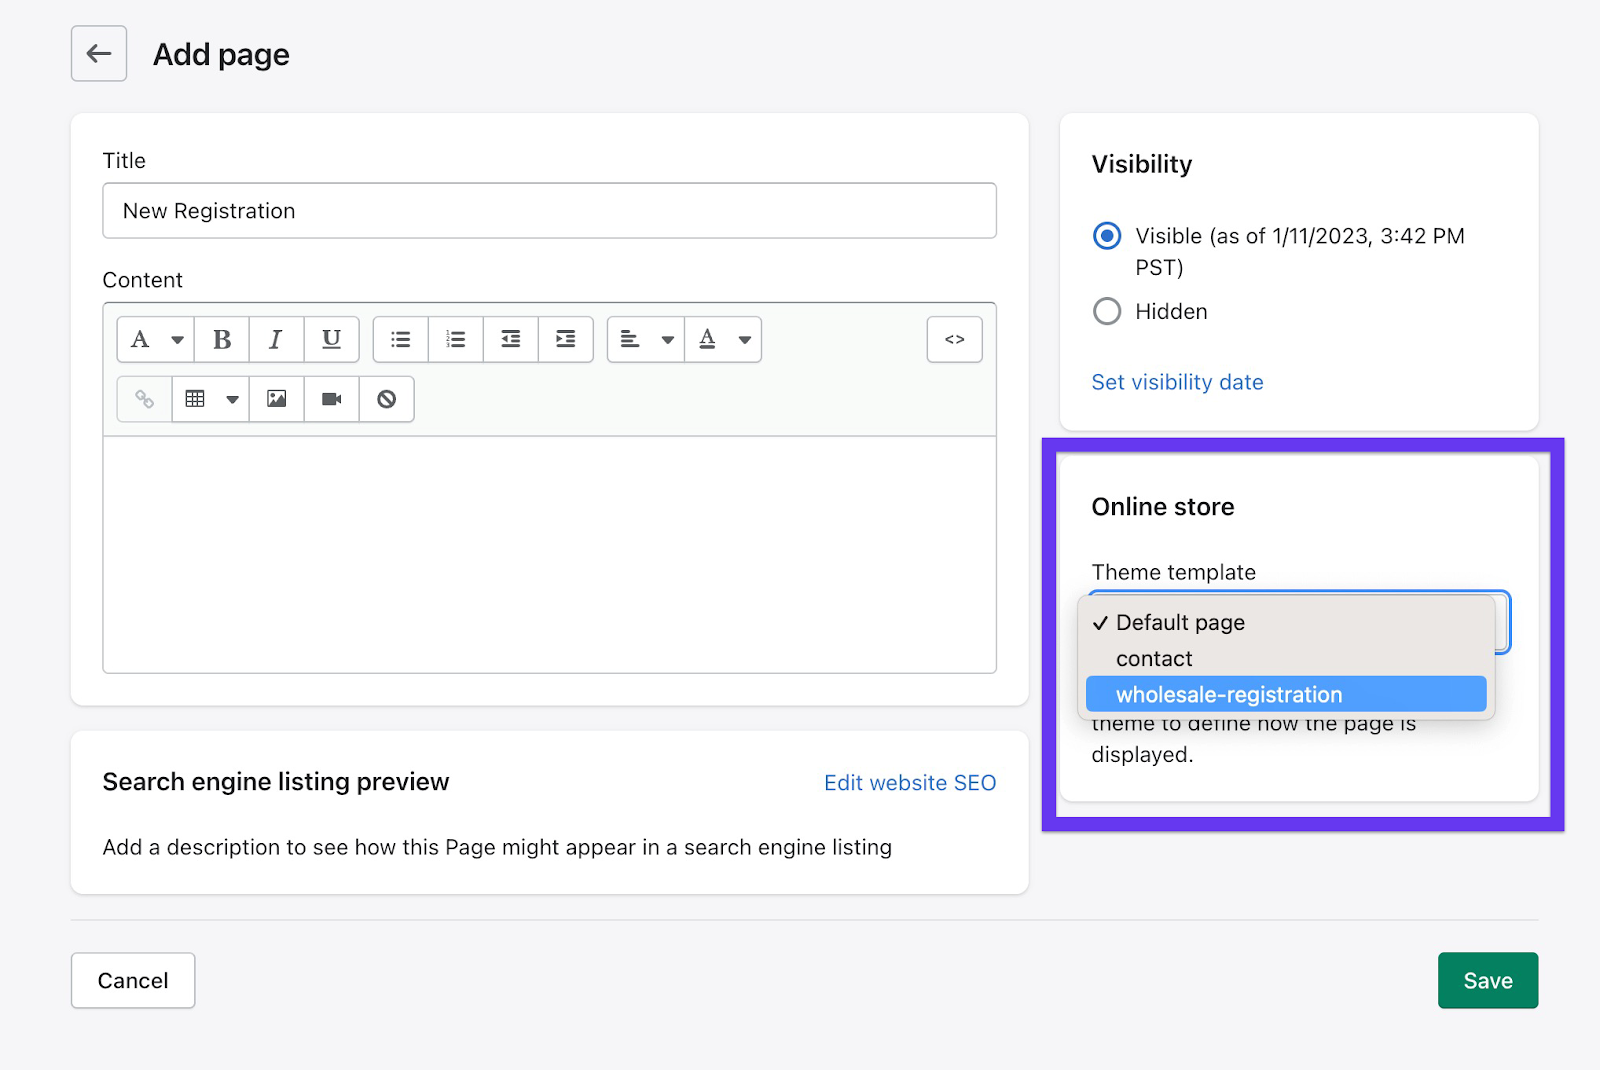
Once selected, hit save. Your new template is now assigned to a page in your Shopify store. Great job!
Head on back to your theme editor, you now have fully dynamic sections and app blocks. 👍 We highly recommend using this method in conjunction with our Customer Fields app when setting up multiple registration forms for different customer groups.
Customer Fields is the go to solution for setting up B2B registration, beauty profiles, birthday capture, and gathering additional registration data from customers.
Ready to Grow Your
Online Business?
Connect with our team to discuss your project and see how we can help.